Quantcast
Channel: Robert Burdick – Developer Blog
Viewing all 12 articles
Browse latest View live

Using the Enhanced List Screen

$
0
0

Now that you’ve had some time to write some BrightScript code with the recent 4.8 software release for Roku 2, Roku LT and Roku HD players, it’s time to look at some other new features in the platform.  This time around, let’s look at what’s new in the list screen component.

With the 4.8 firmware release, the list screen now supports breadcrumb text as well as mini icons for list items.  Implementing breadcrumbs in your list screens is done exactly the same way as with other supporting components:

SetBreadcrumbText(String breadcrumb1, String breadcrumb2) As Void

This can be very handy, for example, when you want to update the breadcrumb text to reflect the current selection or focus in your lists.  The event loop in your screen code can respond to the various list item events and set the breadcrumb text accordingly:

    while (true)
        msg = wait(0, port)
        if (type(msg) = "roListScreenEvent")
            if (msg.isListItemFocused())
                screen.SetBreadcrumbText("Menu", “Index “ + Stri(msg.GetIndex()))
            endif
        endif
    end while

The next new feature is the ability to add icons to your list elements.  This lets you add a bit of graphical context to each of the items in a list.  As an example, take a look at the screen shot below from the sample application included with this article:

Each of the list items has a small graphic to the right.  To add graphics like this to a list, all you need to do is specify SDSmallIconUrl and HDSmallIconUrl attributes to the list items in the content list.

    contentList = [
        {
            Title: "Breakfast",
            ID: "1",
            SDSmallIconUrl: "pkg:/images/breakfast_small.png",
            HDSmallIconUrl: "pkg:/images/breakfast_small.png",
            ShortDescriptionLine1: "Breakfast Menu",
            ShortDescriptionLine2: "Select from our award winning offerings"
        },
        ...
    ]
    list = CreateObject("roListScreen")
    list.SetContent(contentList)

In my case, I used 56×56 icons for my list items.  In reality, the images you use can be any size you like, up to the dimensions of a list item.  Using the proper size image would let you create list items that are entirely graphical instead of text.

Another feature available to you in the list screen is the ability to set the screen background image that gets displayed when a list item is focused. That’s how the pancakes in the screenshot above got rendered, for example. Although this feature is not new to the 4.8 firmware release, it is worth highlighting here since it’s not a well known list screen capability. To specify a background image for a list item, include HDBackgroundImageUrl and SDBackgroundImageUrl values.

    contentList = [
        {
            Title: "Breakfast",
            ID: "1",
            SDSmallIconUrl: "pkg:/images/breakfast_small.png",
            HDSmallIconUrl: "pkg:/images/breakfast_small.png",
            HDBackgroundImageUrl: "pkg:/images/breakfast_large.png",
            SDBackgroundImageUrl: "pkg:/images/breakfast_large.png",
            ShortDescriptionLine1: "Breakfast Menu",
            ShortDescriptionLine2: "Select from our award winning offerings"
        },
       ...
     ]

Keep in mind that the various list item attributes can be set for all list items, or for any combination of the list items in your list screens. This gives you a lot of flexibility in how you design your screens.

If you’d like to experiment more with the new list screen features, you can download the full sample application from the link below as a starting point. Good luck!
List Screen Sample


Localizing Your Roku Channels

$
0
0

It is likely that most of the channels you’ve used on your Roku player use English in their user interfaces. However, support for other languages on Roku devices has been steadily improving. Therefore, as a channel developer, it is increasingly important that you know how to build your channels to support a variety of languages. Currently, Roku supports English of course, as well as French (as of firmware version 4.6) and Spanish and German (added in firmware version 4.8.) This article discusses the key steps needed to create multilanguage channels.

Locales on Roku

A localized channel typically contains language or culture specific text and images (such as locally relevant icons.) A localized channel may further contain audio files in the local language. BrightScript makes it easy to include any language specific assets you like as part of your channel. If packaged using the techniques described in this article, the correct assets are loaded and rendered based on the Roku device’s language setting. Furthermore, you can publish one package to the Channel Store that supports all of your languages, instead of one package per language.

Roku channels expect to find locale specific assets in the locale directory hierarchy, similar to the one shown below:

Under the locale folder, you define subfolders for each of the languages supported by your channel. In this example, the channel supports English and Spanish. Accordingly, there is an en_US folder for English and an es_ES folder for Spanish. Each of these locale folders can then contain whatever additional subfolders and files are needed to hold all of the language specific channel assets. For example, icons containing Spanish text could go in an es_ES/images subfolder, or Spanish audio files could go in a folder named es_ES/audio. When your channel runs and makes requests for localized resources, the Roku device will look in the locale folder hierarchy associated with the current language setting on the device. Thus, if the device is configured for Spanish, resource API calls will look in folders under the pkg:/locale/es_ES path. We will take a look at the various localization APIs shortly.

Your channel can also define a default locale folder under locale/default. This folder can be used just like a locale folder, except that it is used to store assets that are common to all locales supported by the channel. For example, if you have a logo or other branding that is common across all languages, those assets can be kept in the default locale folder structure.

Two other files that can be in a locale hierarchy are manifest and translations.xml. The manifest file plays the same role as the main manifest file, specifying the channel title, subtitle, focus and side logos, and the like. The difference is that the values in the locale specific manifest files are used to define these properties for the corresponding language. It is also important to keep in mind that manifest files are additive. The Roku device will parse the top level manifest file, and then parse the locale specific manifest, adding properties from the latter to those found in the top level file. Therefore manifest properties that are locale independent, such as version numbers, should be stored in the top level manifest file.

The second file, translations.xml, is an XLIFF compliant localization file that contains translations of text strings for the associated locale. As an example, this is what a German translations.xml file might look like:

Each element contains a source and a target. The source string is referenced in your BrightScript code to identify a localized string to load into your channel. The target string is the localized version of the source string. The source string is typically the default locale (such as English) version of the string in question. The source is mapped to the target using the BrightScript global function tr():

tr(String source) as String

BrightScript will look up the source string in the translations.xml file that corresponds to the Roku device’s current language settings, and return the associated target string.  For example, if the device’s language is set to German, the following code would return the string “Verlassen Video”:

REM This call will return “Verlassen Video”
str = tr(“Exit Video”)

Loading Non-String Resources in a Localized Channel

Previously we saw how localized strings are loaded into a channel using the tr() command.  But what about other resources such as images?  For this there is a BrightScript component called roLocalization.  The main method defined by this component for loading resources is GetLocalizedAsset:

GetLocalizedAsset(String dirName, String fileName) as String

This function takes two string arguments.  The first is the name of the directory in which the file specified by the second argument is located.  The directory name is relative to the corresponding locale folder.  As an example, let’s assume that the Roku device language is set to French.  Further, let’s assume that you want to load an image file called playbutton.png located in your locale/fr_CA/images folder.  Since the Roku device knows that the current language is set to French, you don’t need to specify locale/fr_CA as part of the directory name.  The device knows to look there for the resource.  So you would call GetLocalizedAsset as follows:

path_to_image = GetLocalizedAsset(“images”, “playbutton.png”)

After this call, path_to_image will contain the full path to the image, specifically:

pkg://locale/fr_CA/images/playbutton.png

Your BrightScript code can then use this return value to load the image into any UI component.  To make using GetLocalizedAsset easy, images or other assets in your channel should use the same file name for each locale version.  In the previous example, each version of the image file should be named playbutton.png.  This allows you to make one GetLocalizedAsset call to load the image independent of the Roku device language settings.

When searching for assets, GetLocalizedAsset first looks in the current locale folder structure.  If the specified file is not found, the API will search the locale/default folder.  If the file is not there, it looks next in the locale/en_US folder.  If the asset is not found there, GetLocalizedAsset returns an empty string.

To help you dig deeper into Roku channel localization, I’ve updated the Channel Diner sample application from my last post.  The diner now has three cuisines: Mexican, French, and good old classic American food.  To see the various options, set your Roku device language to English, French, or Spanish and have fun!
Sample Localization Channel

Getting Started with BrightScript Screen Navigation

$
0
0

A common task for BrightScript developers is implementing the screen navigation that underlies the user interface flow in their Roku channels.  In this article we will explore some basic BrightScript screen navigation techniques.  When you have finished reading and played with the sample channel and dug through the source code, you’ll have a good understanding of BrightScript screen navigation.

The Screen Stack

An important fundamental concept in BrightScript navigation is the screen stack.  The Roku device maintains an internal stack of screens.  Whenever a screen is created, it is added to the top of the stack.  All remote control events are sent to the screen at the top of the screen stack.  These events are sent to your BrightScript code as messages handled by the message loops that you code.

From BrightScript, screens are added to the top of the stack by calling the screen’s Show() function.  This call also displays the screen in your channel.  Pressing the back button on the Roku remote closes the screen and removes it from the screen stack.  Closing a screen can also be done programmatically by calling the screen’s Close() function.  You may want to do this, for example, to dismiss a screen in response to a button press or some other event.

Typically, you create a new screen in your channel with a custom BrightScript function.  This function will create an instance of one of the BrightScript screen components, such as roGridScreen, roListScreen, and so on.  The function will also create a message port and assign it to the screen, which then listens for incoming events directed to it if it is on top of the screen stack.  Additionally, the screen will populate its content and other UI elements in this function.  As an example, here is how the sample channel provided with this article creates the lunch menu screen.  The code that populates the UI has been removed for brevity, but can be explored if you download the full sample channel:

Function CreateLunchMenu() as integer
    screen = CreateObject("roGridScreen")
    port = CreateObject("roMessagePort")
    screen.SetMessagePort(port)
    screen.show()

    while (true)
      msg = wait(0, port)
      if type(msg) = "roGridScreenEvent"
        if (msg.isScreenClosed())
          return -1
        endif
      endif
    end while
End Function

A call to CreateLunchMenu() from anywhere else in the BrightScript code will thus create the lunch menu screen, add it to the top of the screen stack, and display it on the user’s TV.

Implementing a Simple Navigation Menu

The screenshot below shows a landing page typical of many Roku channels. The list screen component is a common way to implement simple menus that drive the navigation through channel content. Each list item can represent a video genre, a music style, a group of settings, or any other content category that you want to group in your channel. In a typical channel, when a list item is selected, the channel navigates to a new screen. In our example, the list screen allows the user to browse the breakfast and lunch menus at a hypothetical diner. Selecting one of the items brings up a detailed list of offerings for that particular meal category.

The key to navigating to a new screen when a list item is selected is to handle the list screen’s isListItemSelected event. The index returned by msg.GetIndex() contains the zero-based index of the selected list item. Your channel can map each list item index to a unique screen and navigate to that screen in response to the isListItemSelected event. There are a couple of ways to accomplish this. The simplest is to just use an if statement approach in the calling screen’s event loop that tests the selected index and calls the right function:

while (true)
    msg = wait(0, port)
    if (type(msg) = "roListScreenEvent")
      if (msg.isListItemSelected())
        index = msg.GetIndex()
        if (index = 0)
          ShowBreakfastMenu()
        else if (index = 1)
          ShowLunchMenu()
          …
        endif
      endif
    endif
end while

Another more complex, but cleaner, way to do this is to create an array of function references.

menuFunctions = [ShowBreakfastMenu, ShowLunchMenu,…]
while (true)
    msg = wait(0, port)
    if (type(msg) = "roListScreenEvent")
      if (msg.isListItemSelected())
        menuFunctions[msg.GetIndex()]() ‘Call function based on index
      endif
    endif
end while

The key to understanding how this code works lies in the BrightScript function reference concept.  A function reference is just the name of a given function.  Function references can be assigned to variables, used as array elements, and even passed to other functions.  The function that corresponds to a function reference can be called by using the function call operator “()”.  Here are some examples of calling a function called doSomething by reference:

Function doSomething() as void
    ...
End Function
doSomethingReference = doSomething
‘Call doSomething by reference
doSomethingReference()
references = [doSomething, …] ‘We can also put function references in an array
references[0]() ‘Call doSomething through the array element function reference

With this in mind, let’s go back to the second approach to implementing the menu in the list view screen.  The array menuFunctions contains the name of each of the channel’s screen creation functions.  These are in the same order as the list items to which they correspond in the associated list screen.  Then, when the isListItemSelected event is handled in the list screen’s event loop, we grab the corresponding function name from the menuFunctions array.  The function is then called by reference using the “()” operator on the correct array element:

menuFunctions[msg.GetIndex()]() ‘Call function based on index

In the sample channel we use the function reference approach.  To see what the menu items actually do, click the Breakfast menu item and you’ll see the detailed breakfast menu rendered in a simple poster screen:

Clicking the Lunch menu item displays the detailed lunch menu, which is implemented using a grid screen:

Deeper Navigation

So far we’ve looked at how to use a list screen to build simple category navigation into a channel.  Moving from screens like the poster or grid screens above to other screens in your channel is just as easy.  Simply handle the isListItemSelected event in the screen’s event loop to detect when an item is selected and respond appropriately.

In the sample channel, you can click on any of the items in the breakfast menu poster screen to display a details screen with more information about the selected item.  A sample of this screen (also called a “springboard” screen) is shown below:

The two buttons at the right of this screen demonstrate another BrightScript navigation technique.  When one of these buttons is selected, the details screen receives an isButtonPressed event.  The message sent with the event contains the index of the selected button.  As with list, poster, and grid screen item indexes, this button index can be used to control what the channel does in response to the button press, including navigating to new screens, opening dialogs, and other actions.

while (true)
    msg = wait(0, port)
    if (type(msg) = "roSpringboardScreenEvent")
      if (msg.isButtonPressed())
        buttonIndex = msg.GetIndex()
        'Open a new screen corresponding to the button index
        …
      endif
  endif
end while

To try and minimize the size of the sample channel download, only the breakfast and lunch list screen items open poster or grid screens. Furthermore, only the breakfast menu poster screen items can be clicked to open details screens. You could easily use these two categories as a guide to complete the channel on your own. Or you can just use the code as is to get started navigating within your own channels. Happy coding!

Click Here To Download The Sample Channel

Communicating with Web Services from BrightScript

$
0
0

In the last few blog posts, we’ve been looking at implementing fundamental functionality in BrightScript channels.  This trend continues in this installment.  This time around, we will be exploring how to communicate with web services from BrightScript.  Web service interaction is essential to BrightScript channel development, as the majority of the content consumed by the Roku Streaming Player is hosted on the Internet.  To demonstrate the basics of consuming web services from BrightScript, we will use a simple channel that loads and plays free content from The Khan Academy.  For purposes of this article, we will assume that you already understand the basics of HTTP, XML and JSON data formatting, and the concepts around web APIs such as REST.  This article is meant to illustrate taking advantage of such technologies from BrightScript.  The complete details of the Khan Academy API can be found here: Khan Academy API

Keep in mind that every web service enabled channel is going to look very different, access different services, and use data in a variety of ways.  However the code in this article and in the accompanying sample channel are fairly typical of this type of channel, and as such will give you a good sense of the general approach to communicating with web services from BrightScript.

The roUrlTransfer Component

The BrightScript component used to communicate with remote servers is called roUrlTransfer.  Using this component, channels can perform any HTTP requests (GET, POST, etc.) and of course read data returned in HTTP responses.  Requests can be made either synchronously or asynchronously.  The component can also perform mutual authentication with the server hosting the content. Perhaps the simplest operation you can perform with roUrlTransfer is an HTTP GET:

    request = CreateObject("roUrlTransfer")
    request.SetUrl("http://blog.roku.com/developer")
    html = request.GetToString()

request is an roUrlTransfer instance.  The SetUrl function specifies the URL to which request will connect.  Finally, the GetToString function synchronously issues the actual HTTP request and blocks until the remote server returns.  The return value of GetToString contains the HTTP response.  Data can be posted to web resources as well using the PostFromString function:

    Integer PostFromString(String request)

This function performs an HTTP POST to the url specified by calling SetUrl.  The string argument contains the data that you want to POST to the specified resource.  In most cases, when communicating with web services, you will be doing GET requests to pull video feeds and perform other such operations exposed by web service APIs.

Asynchronous HTTP Requests

In many cases you will not want HTTP requests to block.  roUrlTransfer can easily make asynchronous requests.  For example, to make an asynchronous HTTP GET request, you can use the roUrlTransfer function AsyncGetToString:

    Boolean AsyncGetToString(void)

This function makes an HTTP GET request to the url specified by SetUrl.  The function returns immediately.  The return value indicates whether the request was sent successfully.  In order for your channel to detect when the remote server has returned a response, you need to assign an roMessagePort to the roUrlTransfer instance that made the GET request.  Your BrightScript code can then wait on that port, testing for the appropriate response codes.

In our sample, wait is called with a timeout of one second.  If the HTTP request completes in that timeframe, wait returns an roUrlEvent.  The BrightScript code then checks the response code, and if the request was successful, proceeds to parse the returned JSON.  If the HTTP request doesn’t respond within one second, the wait call will time out and return invalid.  In this case we can assume that the API server is unresponsive and we cancel the request by calling the roUrlTransfer function AsyncCancel.

Under the covers roUrlTransfer is implemented with curl.  Error codes that are reported to your roUrlTransfer event loop are therefore CURL codes.  roUrlTransfer events have the type roUrlEvent.  Details of the response codes that can be returned are found here: roUrlEvent Response Codes

As an example of making an asynchronous request, let’s say that we want to make a call to the Khan Academy API.  In this sample, we request all of the video playlists in the Khan Academy library.  This is done by calling the API http://www.khanacademy.org/api/v1/playlists.  If the request is successful, the HTTP response will contain a JSON formatted list of all of the playlists.

Function get_playlist() as object
    request = CreateObject("roUrlTransfer")
    port = CreateObject("roMessagePort")
    request.SetMessagePort(port)
    request.SetUrl("http://www.khanacademy.org/api/v1/playlists")
    if (request.AsyncGetToString())
        while (true)
            msg = wait(0, port)
            if (type(msg) = "roUrlEvent")
                code = msg.GetResponseCode()
                if (code = 200)
                    playlist = CreateObject("roArray", 10, true)
                    json = ParseJSON(msg.GetString())
                    for each kind in json
                        topic = {
                            ID: kind.id
                            Title: kind.standalone_title
                        }
                        playlist.push(topic)
                    end for
                    return playlist
                endif
            else if (event = invalid)
                request.AsyncCancel()
            endif
        end while
    endif
    return invalid
End Function

There is a lot going on here.  First we create an roUrlTransfer instance, called request, and assign an roMessagePort to it.  We then set the URL of request to the web service API we want to call.  We then issue the HTTP request by calling AsyncGetToString, and wait on the message port assigned to request.

If the API request is successful and returns a status code of 200 (HTTP OK) the HTTP response from the API will be a JSON formatted list of all of the topics in the KhanAcademy library.  A typical playlist request looks like this (click the image to enlarge)

Khan API JSON Response

The response consists of a number of topics containing the unique id, title, description, etc. for a specific Kahn Academy topic.  Our BrightScript code accesses this response by calling the msg.GetString function.  This response will be in raw JSON string format.  It can be converted to roAssociativeArray format by passing it to the BrightScript ParseJSON API.  Our get_playlist function iterates through each topic in the JSON response, creating a topic object for each, and putting each of these in a topics array.

Not all web services pass data using JSON format.  Many services still use some form of XML for communication.  If this is the case for the service you need to interact with, the BrightScript’s native XML support would be used in place of the ParseJSON API.  For more on the BrightScript JSON API, see this article: BrightScript JSON Support  For more information about BrightScript XML support, look here: BrightScript XML Support

Additional web service API calls can be made from the BrightScript code in the same way.  Simply use the roUrlTransfer component to target the right API URL, make the request, and parse the response.  As another example, let’s look at how you can use the results of the previous API call to load the videos for a given topic in the playlist.

As we saw, the playlist response consists of a collection of topic objects.  Each of these topics has an id property that can be used in other Khan Academy APIs to load various details for that topic.  To load the videos for a topic, call the API

http://www.khanacademy.org/api/v1/topic/[topic_id]/videos

For example, here is how our channel could load all of the videos for the absolute value topic.  This code is very similar to the code above for loading the playlist.  We use and roUrlTransfer instance to make the HTTP request, wait for a response from the API service, and then parse the returned data according to the needs of our channel.  In this case the video information is loaded into an array for use in a poster screen UI.

Function get_topic_videos(id as String) as object
    request = CreateObject("roUrlTransfer")
    port = CreateObject("roMessagePort")
    request.SetMessagePort(port)
    request.SetUrl("http://www.khanacademy.org/api/v1/topic/absolute-value/videos")
    if (request.AsyncGetToString())
        while (true)
            msg = wait(1000, port)
            if (type(msg) = "roUrlEvent")
                code = msg.GetResponseCode()
                if (code = 200)
                    videos = CreateObject("roArray", 10, true)
                    json = ParseJSON(msg.GetString())
                    for each kind in json
                        video = {
                            Title: kind.title
                            ShortDescriptionLine1: kind.description
                            Description: kind.description
                            Views: kind.views
                        }
                        if (kind.download_urls <> invalid)
                            video.SDPosterURL = kind.download_urls.png
                            video.HDPosterURL = kind.download_urls.png
                            video.Url = kind.download_urls.m3u8
                        endif
                        videos.push(video)
                    end for
                    return videos
                endif
            endif
            if (msg = invalid)
                request.AsyncCancel()
            endif
        end while
    endif
    return invalid
End Function

To dive deeper into using WebServices from BrightScript, download the sample Khan Academy channel from this link:
Sample Channel
Feel free to add API calls to add additional functionality to test out your knowledge.  Happy Coding!

Introducing the BrightScript 2D API

$
0
0

In many of our recent articles, we have looked at how to use the screen and other UI templates offered by the BrightScript SDK. These components are great for getting your channels developed quickly and for giving them the standard Roku look and feel. There may be times, however, when you want to build something that doesn’t fit into this template model. You might want to implement your own custom grid for displaying poster art, display text in a non-standard way, or create a simple casual game. For many of these situations, the BrightScript 2D Graphics API may be just the thing you are looking for. The 2D API provides a number of fundamental drawing functions for drawing basic shapes, rendering and rotating images, and the like.

In this article we will look at the most basic operations provided by the 2D API. In a later installment we will dive into more advanced topics such as double buffering. Like always, a sample BrightScript channel with full source code accompanies this article. In this case, I’ve written a basic tic tac toe game. The game engine was ported from a free JavaScript sample that can be found at JavaScriptKit. This version of tic tac toe pits you against your Roku Streaming Player. Download the sample from this link and install it onto your player. You can use the remote control arrow keys to move around the playing grid, highlighting the currently focused square as you go. To select your move, press the OK key and a large ‘X’ will be drawn in your selected square. The Roku device will then make its move, drawing a circle in the square it selects. Play continues until one of you wins, or you tie. Please note that this sample game has been written for HD only, and won’t look too great on SD TVs.  A sample of the game screen in shown below.

roScreen and the ifDraw2D Interface

The first thing to know about using the 2D API is that all rendering with the API is done via functions defined on the ifDraw2D interface. This interface is in turn implemented by the roScreen component. Therefore, in order to use the 2D API, your channel needs to create an instance of roScreen. Creating an roScreen instance is as simple as creating any other screen type in BrightScript:

screen = CreateObject(“roScreen”)

When creating an roScreen instance, CreateObject can accept a second optional boolean parameter that indicates whether the screen is double buffered.

screen = CreateObject(“roScreen”, true) ‘This creates a double buffered screen

The 2D API supports alpha blending. To turn on alpha blending call SetAlphaEnable(true). To disable alpha blending call SetAlphaEnable(false). API calls that take a color value include an alpha value that is used when alpha blending is enabled.

Like other BrightScript screen types, roScreen should be assigned a message port so that it can listen for application events such as remote control events.  Once the screen is created, you can start calling 2D API functions.  We will get to some of these shortly.  First though we need to talk about a very key step in drawing 2D graphics.  To guarantee that graphic operations are performed in single buffered screens, your channel needs to call the ifDraw2D method Finish().  Finish is a synchronous API that forces all queued graphics calls to complete.  Before calling Finish, graphics that your channel renders may not be visible to the user.  Keep this in mind as you are experimenting with the 2D API.  If things that you are expecting are not drawing on the screen, check to see if Finish is being called.  Taking the Finish function into account, the typical single buffered 2D API channel will have code that looks like this:

screen = CreateObject("roScreen")
port = CreateObject("roMessagePort")
screen.SetMessagePort(port)
‘Perform various drawing, graphics, etc. operations
screen.Finish()

The majority of the work of course is done by the specific 2D API methods which we introduce next.

Drawing Lines and Rectangles

Perhaps the simplest graphics operations that you can perform with the 2D API are drawing lines and rectangles.  The corresponding API functions are

Boolean DrawLine(Integer xStart, Integer yStart, Integer xEnd, Integer yEnd, Integer rgba)
Boolean DrawRect(Integer x, Integer y, Integer width, Integer height, Integer rgba)

These functions are pretty obvious, except perhaps for the return values and the rgba argument.  Many of the 2D API drawing functions return a Boolean value indicating whether the call completed successfully.  The rgba argument is also common to many of the functions, and specifies the RGB color value as well as the alpha channel value to use when rendering the associated object.  For example, to draw a filled yellow filled rectangle at location (0,0) that is 100 pixels wide and 200 pixels high with 100% alpha, you would call DrawRect as follows:

screen.DrawRect(0, 0, 100, 200, &hFFFF00FF)

In our tic tac toe game, we use DrawRect and DrawLine calls to render the game grid, the focus rectangle that is drawn when a square is highlighted, and the ‘X’ used to mark the player’s move selections:

Function mark_selected_move(index as integer, useX as Boolean) as void
… ‘Code removed for simplicity
x = ((horz_line_sep) * index)+inset_x+line_width
y = inset_y + 10
w = horz_line_sep
h = vert_line_sep
screen.DrawLine(x, y, w+x-10, h+y-10, &h808080FF)
screen.DrawLine(x+horz_line_sep, y, x, h+y-10, &h808080FF)
…
End Function

This function defines the start and end points for two diagonal lines centered in the square in the game grid selected by the player.  These values are defined in terms of things like the vertical and horizontal distances between the game grid lines, as well as the width of those lines.  The essential point here is that the DrawLine function is used twice to mark the player’s move on the game screen.

Drawing Images

The BrightScript 2D API can also be used to draw images.  Images in JPG or PNG format can be rendered using the ifDraw2D interface DrawObject function:

Boolean DrawObject(Integer x, Integer y, Object src)

DrawObject renders the object specified by the src argument at the (x, y) location on the screen specified by the first two arguments.  src can be an roBitmap or an roRegion (a section of a bitmap.)  For example, to draw the image packaged with a channel in the location pkg:/images/myimage.png, you could use the following BrightScript code:

screen = CreateObject("roScreen")
img = CreateObject(“roBitmap”, “pkg:/images/myimage.png”)
screen.DrawObject(0, 0, img)
screen.Finish()

Our tic tac toe game uses this image rendering technique to draw a circle in game grid squares when the Roku Player makes a move. The 2D API does not include a function for drawing circles similar to DrawLine or DrawRect. Therefore in order to draw a circle to represent your opponent’s moves, we draw a PNG file packaged with the channel.

Drawing Text

The 2d API can also be used to draw text. The function used for this purpose is, you guessed it, DrawText:

Boolean DrawText(String text, Integer x, Integer y, Integer rgba, Object font)

text contains the string to draw, and font contains the font to use when rendering the text. rgba contains the color and alpha values to use. In our tic tac toe game, we use DrawText to announce the winner of the game, or to indicate that there was a tie:

As an example of how to use the DrawText API, here is how you could draw the text “Hello Roku” using the default device font:

fontRegistry = CreateObject("roFontRegistry")
font = fontRegistry.GetDefaultFont()
screen.DrawText(txt, 0, 0, &h00FFFFFF, font)
screen.Finish()

Note that drawing text is a very expensive operation and should be done sparingly.

More Information

More information about the 2D API can be found starting from the SDK documentation for the roScreen component at this link. The tic tac to sample game can be downloaded by clicking this link. Stay tuned for more articles on additional 2D graphics topics. In the meantime, have fun experimenting with Roku’s graphics features.

Sprites and Animations Using the 2D API

$
0
0

In our last article, we took an introductory look at using the BrightScript 2D API.  The coverage there was pretty high level, and focused on basics like drawing simple shapes, images, and text on single buffered roScreens.  In this article, we will explore some of the more advanced 2D API concepts and show how to build richer applications with the API.  We will look at things like compositors, sprites, and animations.

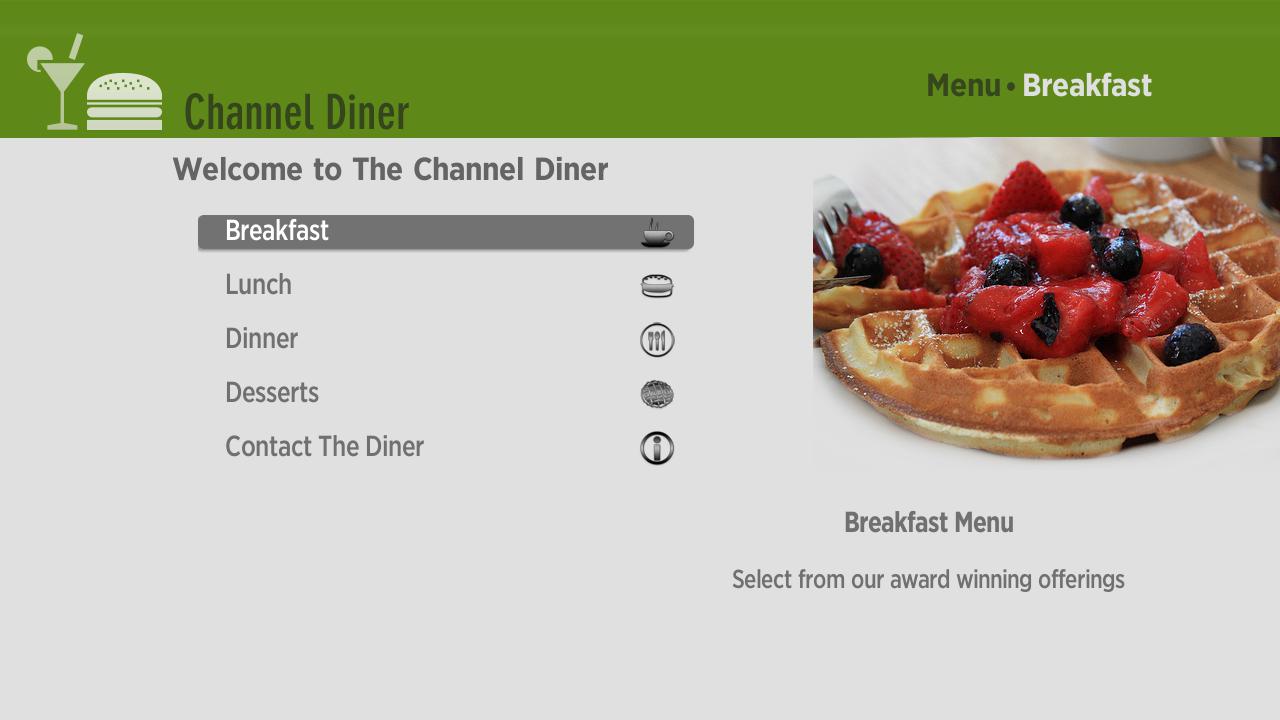
For this article, I’ve included two simple sample channels demonstrating the techniques described in this article.  The first sample is a sprite animation of snowflakes falling in a chilly winter scene.  Here is a screenshot from the channel:

The sample channel can be downloaded from this link.

The second sample, to be discussed later, is much simpler. It shows how to animate a single sprite, giving you a reference for the most fundamental aspect of developing animations. This second sample can be downloaded from this link.

Double Buffering

In our last article we focused exclusively on single buffered drawing in the roScreen.  With this technique, you make 2D API calls and then make them render on screen with a call to the ifDraw2D interface Finish() API.

Double buffering is the technique of rendering screen content such as video or animations using two buffers of memory.  Data in one buffer is rendered on the screen while the other buffer is preparing or processing the next frame of data to be displayed.  In effect, one frame of content is displayed while the next one is being prepared in the background.  The buffers are swapped when the background frame is ready.  The result is faster rendering with no image tearing.

The BrightScript 2D API implements double buffering through the roScreen SwapBuffers() function.  This function is used in place of the Finish() function that forces draw operations to complete in single buffered applications.

    screen = CreateObject("roScreen", true)
    port = CreateObject("roMessagePort")
    screen.SetMessagePort(port)
    ‘Perform various drawing, graphics, etc. operations
    screen.SwapBuffers()

To use double buffering, the roScreen instances that you create need to specify true in the second argument to the CreateObject() call.  The default, where no true value is passed, is to create a screen that only does single buffering.  All of the drawing that you want to do in a given frame using the 2D API is done the same as in the single buffered case.  Basic shape drawing, image rendering, animations, etc. are done as if the screen were single buffered.  The difference is that you call SwapBuffers() to render the frame.  All of the drawing operation calls that you’ve made get completed and the background buffer is swapped to the front and thus made visible to the user.  As a BrightScript developer, you don’t need to keep track of the buffers involved in the rendering.  All you need to remember is to create an roScreen for double buffering, and use SwapBuffers() to display your graphics.

Compositors and Sprites

The BrightScript 2D API provides great support for sprites and animations.  It is very easy to create channels and games that incorporate these elements resulting in rich graphical experiences.  Sprites are created and drawn using a BrightScript component called a compositor.  Compositors enable the composition and animation of multiple sprites or regions.  Compositors are implemented with the roCompositor component.  The ifCompositor interface which roCompositor implements contains drawing methods for rendering sprite content that the compositor contains.  A compositor is linked to an roScreen by calling the roCompositor SetDrawTo() function:

Void SetDrawTo(Object destBitmap, Integer rgbaBackground)

destBitmap is the destination to which compositor draw functions render.  The destination is normally the application’s roScreen instance.  rgbaBackground specifies the background color of the destination.  Often applications will load a separate full screen sprite to use as the background.  If you do this, you can set the SetDrawTo() background argument to 0.

Sprites are created using the compositor NewSprite() function:

Object NewSprite(Integer x, Integer y, Object region, Integer z)

The x and y arguments specify the location where the sprite will be placed on the screen when rendered.  region is the roRegion (portion of an roBitmap) to be drawn.  z is an optional argument that specifies the Z-order.

Here is an example of how to create a compositor, associate it with an roScreen, and then create a sprite on the compositor:

    screen = CreateObject("roScreen", true) ‘Create a double buffered roScreen
    compositor = CreateObject(“roCompositor”)
    compositor.SetDrawTo(screen, 0)  ‘Tie the compositor to the screen
    bmp = CreateObject(“roBitmap”, “pkg:/images/myimage.png”)  ‘Load the image
    region = CreateObject("roRegion", bmp, 0, 0, 128, 128)      ‘Create a region
    sprite = compositor.NewSprite(0, 0, region)  ‘Create the sprite

To draw the sprite on the screen, the ifCompositor interface defines two functions:

    Void Draw()
    Void DrawAll()

The first of the function, Draw(), draws any sprites that have changed in some way since the last call to Draw() or DrawAll().  For example, a change to the sprite’s x or y location would mean that the sprite has changed and is subject to being drawn.  Or the bitmap region assigned to the sprite could be changed.  In cases where you want to draw everything regardless of changes, use DrawAll().  This function forces a redraw of every sprite contained by the compositor.

Sprite Details

So far we’ve examined the basics of sprites at a high level.  Now let’s take a closer look at some of the key functions and features of sprites.  The roSprite component implements the ifSprite interface.  The location of a sprite can be changed using the MoveTo() function:

Void MoveTo(Integer x, Integer y)

This function sets the position of the sprite to the x, y location specified.  If you need to find the x or y location or z-order of a sprite, you can call:

Integer GetX()
Integer GetY()
Integer GetZ()

Sprites can also have application specific data assigned to them.  For example, in an animation, you might want to have different sprites move at different rates.  This could be implemented as different x and y location deltas that you store with the sprite.  This data can then be read as needed when moving each sprite.  For such purposes, ifSprite includes the SetData() and GetData() functions:

Void SetData(TVAL data)
TVAL GetData()

SetData() takes any typed value, including intrinsic types and objects, as an argument.  In the scenario we described of different animation rates, you could assign that data to a sprite as an associative array like this:

    dx = Amount to move X
    dy = Amount to move Y
    sprite.SetData( {deltaX: dx, deltaY: dy} )

Removing a sprite from a compositor is a simple matter of calling Remove():

    void Remove()

Calling this function removes the sprite from its compositor and then deletes the sprite from memory.

Sprite Animations

Sprites are often used to animate graphics in applications.  This is particularly common for games, screen savers and the like.  Animating sprites includes moving the sprites location around the screen, a topic we’ve just covered.  But animations can also include animating the sprites themselves, i.e., changing their orientation, rotating them, etc. whether or not they move around the screen.

To understand sprite animation, it is important to know about the concept of bitmap sets.  A bitmap set is a collection of regions, animation frames, and other information about resources used in 2D API applications.  A bitmap set is defined by an XML file packaged with the channel.  A typical bitmap set XML file looks like this:

<BitmapSet>

    <Bitmap name="sprite_bitmapset" filespec="pkg:/assets/bitmapset.png">
        <Region name="r1" x="0" y="0" w="300" h="300" />
        <Region name="r2" x="300" y="0" w="300" h="300" />
        <Region name="r3" x="600" y="0" w="300" h="300" />
        <Region name="r4" x="900" y="0" w="300" h="300" />
    </Bitmap>

    <Animation name="animated_sprite">
        <frame use="sprite_bitmapset.r1" />
        <frame use="sprite_bitmapset.r2" />
        <frame use="sprite_bitmapset.r3" />
        <frame use="sprite_bitmapset.r4" />
    </Animation>

</BitmapSet>

A bitmap set is loaded into a BrightScript channel using the function dfNewBitmapSet() defined in a helper library called bslDefender.  bslDefender contains a set of functions that simplify some 2D API tasks.  Details of this library can be found here.

Object dfNewBitmapSet(String filename)

This function takes the path to the bitmap set XML file as an argument and returns an associative array containing the bitmap set details.

A bitmap set can contain one or more <Bitmap> elements.  Each of these defines a single bitmap that can be further broken into a set of regions.  This is convenient since, as you’ll recall, sprites are created from bitmap regions.  In the bitmap set XML example above, pkg:/assets/bitmapset.png refers to the 1200 x 300 image shown below:

This image contains four views of a text string each in a different orientation. The section in the bitmap set XML file that refers to this image defines four regions, one for each 300 x 300 section of the source image at each of the four orientations.
The next section of the XML file shows how an animation is defined using these regions. An <Animation> element contains one or more <frame> elements. Each frame refers to a bitmap region. When the animation is played, each of the frames is rendered in order to provide the animation effect.
BrightScript channels can create animated sprites using the ifCompositor function NewAnimatedSprite():

    Object NewAnimatedSprite(Integer x, Integer y, Object regionArray, Integer z)

This function is similar to NewSprite(), except that it takes a region array argument, instead of a single region, which is used to define the animation frames.
Once an animation loaded, it is animated by calling the ifCompositor function AnimationTick():

    Void AnimationTick(Integer duration)

Each call to this function tells the compositor to move each animated sprite it contains to the next frame in the sprite’s frameset. The duration argument is used to specify the number of milliseconds that have elapsed since the last call to the function. The platform uses this value to smooth out animations depending on how much time elapses between animation ticks. It is thus possible to write frame rate independent animations.

To write frame rate independent BrightScript animations, the roTimespan component can be used to track the amount of time that elapses between AnimationTick calls.  roTimespan is BrightScript’s timer component.  A complete example of how to create and animate a sprite in this way is shown below.  This code is in the second downloadable example.

Library "v30/bslDefender.brs"
Function Main() as void
screen = CreateObject("roScreen", true)
port = CreateObject("roMessagePort")
bitmapset = dfNewBitmapSet(ReadAsciiFile("pkg:/assets/bitmapset.xml"))
compositor = CreateObject("roCompositor")
compositor.SetDrawTo(screen, &h000000FF)
clock = CreateObject("roTimespan")
clock.Mark()
screen.SetMessagePort(port)
screen.SetAlphaEnable(true)
sprite = compositor.NewAnimatedSprite(450, 225, bitmapset.animations.animated_sprite)
    while true
        event = port.GetMessage()
        if (event = invalid)
                ticks = clock.TotalMilliseconds()
            if (ticks > 1000)
                compositor.AnimationTick(ticks)
                compositor.DrawAll()
                screen.SwapBuffers()
                clock.Mark()
            endif
        endif
    end while
End Function

With each pass through the event loop, we make a call to roTimespan TotalMilliseconds().  This function returns the total number of milliseconds that have elapsed since the last roTimespan Mark() function call.  When the number of milliseconds is greater than 1000, we animate the sprite one frame.

The snow scene sample channel provided with this article uses the same techniques as the code above.  The main difference is that instead of creating one animated sprite, it creates numerous sprites.

You should now have a good foundation to start building your own animated 2D BrightScript channels.  Download and explore the samples, and as always, happy coding!
Click here for the snowflakes sample.
Click here for the simple single sprite animation sample.

Colliding Sprites

$
0
0

Our last installment introduced using the BrightScript 2D API to create sprites and animations.  In this article we will look at how to add collisions to sprite animations.  Many 2D games use these techniques to simulate real world physics.  Ricocheting bullets, bouncing balls, and birds crashing into pigs are some examples of scenarios that you might want to include in a 2D application.

To demonstrate and help you better understand these topics, I have included a sample BrightScript channel which can be downloaded here.  The sample animates up to five bouncing and colliding billiard balls.  It starts with just one ball, but you can add up to a total of five by pressing the remote control right arrow key.  A screen shot of the channel in action is shown below.

Detecting Sprite Collisions

The BrightScript ifSprite interface, supported by the roSprite component, includes functions for detecting collisions.  The simplest of these is CheckCollision():

Object CheckCollision()

This function returns the first sprite that this calling sprite collides with.  A collision is basically defined by overlap between the bounding rectangles of the two sprites.  There is actually more to the formal technical definition of a collision in BrightScript which we will get into shortly.  But for now, this definition will suffice.

Closely related to CheckCollision() is the CheckMultipleCollisions() function:

Object CheckMultipleCollisions()

This function returns an array containing all sprites that collide with the calling sprite.  This is useful in situations where there may be many objects colliding with a given sprite at a given time.

A channel with an array of sprites could check for collisions at a given instant in time as follows:

for each sprite in sprites
    dx = sprite x velocity
    dy = sprite y velocity
    sprite.MoveTo( (sprite.GetX() + dx), (sprite.GetY() + dy) )
    collidingSprite = sprite.CheckCollision()
    if (collidingSprite  invalid)
        ‘Move the sprites according to a collision equation
    endif                    
end for

Another interesting sprite feature that can be used in conjunction with collisions is the ability to specify whether a sprite is drawable. This property is set with the SetDrawableFlag() function:

Void SetDrawableFlag(Boolean enable)

Setting this flag on a sprite makes the sprite invisible. However, it can still be moved, animated, and checked for collisions using CheckCollision() and CheckMultipleCollisions(). A 2D game with cloaking device enabled space ships or characters with powers of invisibility lying in wait come to mind! To try out what an invisible collidable sprite can mean, add the indicated line to the sample channel code:

if ((id = codes.BUTTON_RIGHT_PRESSED) AND (spriteCount <= 5))
    spriteCount = spriteCount + 1
    sprites[spriteCount] = compositor.NewAnimatedSprite(Rnd(screenWidth-ballSize),
      Rnd(screenHeight-ballSize), balls[Rnd(5)-1])
    sprites[spriteCount].SetDrawableFlag(false) ‘ADD THIS LINE
    sprites[spriteCount].SetData( {dx: Rnd(20)+10, dy: Rnd(20)+10,
      index: spriteCount} )
endif

Sprite Collidablity

By default, all sprites that you create on a compositor are “collidable.” If their bounding rectangles overlap the check collision functions report a collision. However, you can control the collidability of specific sprites through BrightScript. To see how this is done, we need to talk about sprite member and collidability flags. There are two ifSprite functions for setting these flags:

Void SetCollidableFlags(Integer flags)
Void SetMemberFlags(Integer flags)

The flags argument passed to these functions is interpreted as a set of individual bits. For a sprite to be collidable, not only does its bounding region need to intersect that of another sprite. The corresponding bits in both the collision and member flags value for that sprite must be set. In other words, the bitwise AND of the sprite’s collision and member flags must be non-zero.

At first it might appear that this scheme is overkill. Why not just use a single Boolean flag to specify whether a sprite is collidable? The answer is that this design allows for more complex collision scenarios. You might be building a game that only lets certain types or numbers of projectiles to penetrate a character’s armor, or that lets bullets bounce off another character if he happened to fire a different weapon at the same time. Using the member flag scheme, complex bit masks can be designed that allow such collisions in certain conditions but not others.

Another simpler use of the member flags is to limit collisions with a single sprite to one collision per frame. Channels that use collisions often want to detect collisions and then move the colliding sprites according to a physics algorithm immediately thereafter. This often happens in a loop like the one we showed previously. In cases where there are numerous sprites moving around the screen, updating the location of a sprite after a collision may bring it into collision with another sprite in the same frame. To prevent this, after moving a sprite involved in a collision, you can set the member flags of the colliding sprite to 0. In the next frame, all sprites can have their member flags set back to 1 allowing them to participate in collisions again. Here is an example of how this can be implemented:

while true
    for each sprite in sprites
        sprite.SetMemberFlags(1)
    end for
    event = port.GetMessage()
    if (event = invalid)
        for each sprite in sprites
            collidingSprite = sprite.CheckCollision()
            if (collidingSprite  invalid)
                handleCollision(sprite) ‘Channel specific code to move sprite…
            endif                    
        end for                
    endif
end while
    …
Function handleCollision(sprite as object) as void
    … ‘Move the sprite according to collision physics
    sprite.SetMemberFlags(0) ‘sprite can’t collide again until flags is set to 1 in next frame
End Function

Grab the sample collision channel from this link and start playing around with colliding animated sprites. With this and the last two articles on the BrightScript 2D API under your belt, you should be publishing games to the Roku Channel Store in no time. Happy coding!

Creating Custom BrightScript UIs with Image Canvas

$
0
0

To round out our introductory coverage of BrightScript custom user interface development, we turn our attention to the image canvas component. Although not technically part of the 2D API that we have discussed in the last three posts, image canvas is related in that it provides another way for developers to implement a high degree of customization in their channels. Common uses for the image canvas are custom splash screens, service activation screens (like the Activate or Browse content screens in some channels,) custom popup style menus, and custom video loading screens.

I’ve provided a simple sample channel with this article which can be downloaded here. The sample lets you navigate around a set of 5 billiard balls (I liked the graphics from the Collisions post so much I had to reuse them!) As you right or left arrow between the balls, the selected one is highlighted with a ring image as shown below. Pressing the OK button then displays a second image canvas that implements a custom dialog. We will get to that a bit later.

The roImageCanvas Component

A BrightScript image canvas is simply a surface for rendering arbitrary graphics and text as part of a channel.  It is implemented by the roImageCanvas component.  roImageCanvas is in some ways similar to roScreen of 2D API fame.  However, whereas roScreen can be used for basic 2D drawing, as well as hosting compositors for sprite animations and the like, roImageCanvas is generally used for content that is static.  An image canvas can be assigned a message port so that it can respond to events such as remote key presses.  Creating an image canvas looks just like creating a more customary BrightScript screen type:

canvas = CreateObject("roImageCanvas")
port = CreateObject("roMessagePort")
canvas.SetMessagePort(port)

‘Add content to the canvas
canvas.Show()
…
while true
    event = wait(0, port)
    if (event <> invalid)
        ‘Handle events directed at the canvas…
    endif
end while

Image canvas gets more interesting when it comes to adding content.  Elements such as text and images are added to an image canvas as a set of z-ordered layers.  Each layer can contain an arbitrary number of items.  Each item is defined by an associated array with elements for the text string or url of the image to render, the target rectangle specifying where on the canvas to render the item, text fonts, and the like.  More details on the kinds of information that can be specified in image canvas items can be found in the component metadata documentation at this link.

As an example, to render the text string “Hello Image Canvas!” and an image located at pkg:/images/icon.png on a canvas, your BrightScript code can define an array of items like this:

items = []
items.Push({
    url: "pkg:/images/icon.png"
    TargetRect: {x: 600, y: 40, w: 128, h: 128}
})

items.Push({
    Text: “Hello Image Canvas!”
    TextAttrs: { font: "large", color: "#a0a0a0" }
    TargetRect: {x: 200, y: 75, w: 300, h: 200}
})

The canvas then adds these items as a layer with the SetLayer() function:

Void SetLayer(int zOrder, roAssociativeArray contentMetaData)
Void SetLayer(int zOrder, roArray contentList)

There are two version of this function, allowing you to add one item to a layer at a time (version 1) or numerous items with one call (the second version.)  The first argument specifies the z-order of the layer on the canvas.  The content is then rendered to the screen by calling Show().

In addition to creating layers that contain the canvas content, it is common to set the layer at z-order 0 to control the canvas background, opacity, and composition mode of the background.  So, a complete example would look like this:

canvas = CreateObject("roImageCanvas")    
port = CreateObject("roMessagePort")
canvas.SetMessagePort(port)
items = []
items.Push({
    url: "pkg:/images/icon.png"
    TargetRect: {x: 600, y: 40, w: 128, h: 128}
})
items.Push({
    Text: “Hello Image Canvas!”
    TextAttrs: { font: "large", color: "#a0a0a0" }
    TargetRect: {x: 200, y: 75, w: 300, h: 200}
})
canvas.SetLayer(0, { Color: "#ff000000", CompositionMode: "Source" })
canvas.SetLayer(1, items)
canvas.Show()
while true
    event = wait(0, port)
    if (event  invalid)
       ‘Handle events directed at the canvas…         
    endif
end while

The call that sets layer 0 tells the canvas to render a fully opaque black background on which item pixels completely replace destination pixels.  Alternatively, the CompositionMode can be set to Source_Over, in which case the color alpha value is used to alpha blend the source and destination pixels.  We’ll go into this in more detail a bit later when we add a custom image canvas based dialog to the channel.

By default images are rendered as soon as they are downloaded and available in memory.  Thus, for a mixture of large and small images, you might see some images load before others, in orders that you may not expect.  This behavior can be overridden by calling the image canvas SetRequireAllImagesToDraw() function:

Void SetRequireAllImagesToDraw (Boolean requireAllImages)

When set to true, all images must be downloaded (or loaded from the package if local,) decoded, and loaded into memory before drawing.  The tradeoff here is that performance is impacted when setting this to true.

Using Multiple Image Canvases

BrightScript channels can use more than one image canvas to implement a variety of features and effects. Let’s add a custom message dialog box like the one shown below in the sample channel to see how this is done. In the sample channel, this message dialog appears when you press the remote’s OK button. The array of balls in the channel is 0-index based. Thus the screen shot below shows ball[2] as selected.


Basically all we do is create another image canvas while the first one is displayed. The second image canvas gets populated with the specific graphical elements by creating an associative array of the text and image items, and then assigning them to a layer by calling SetLayer(). Most of the rest of the code defines the target rectangles for the dialog border image and the message text.

Function onOK(selectedIndex as integer) as integer    
    canvas = CreateObject("roImageCanvas")
    port = CreateObject("roMessagePort")
    canvas.SetMessagePort(port)
    canvasRect = canvas.GetCanvasRect()
    dlgRect = {x: 0, y: 0, w: 600, h: 300}
    txtRect = {}
    txt = "Ball #" + stri(selectedIndex) + " Selected"
    fontRegistry = CreateObject("roFontRegistry")
    font = fontRegistry.GetDefaultFont()
    txtRect.w = font.GetOneLineWidth(txt, canvasRect.w)
    txtRect.h = font.GetOneLineHeight()
    txtRect.x = int((canvasRect.w - txtRect.w) / 2)
    txtRect.y = int((canvasRect.h - txtRect.h) / 2)
    dlgRect.x = int((canvasRect.w - dlgRect.w) / 2)
    dlgRect.y = int((canvasRect.h - dlgRect.h) / 2)    
    items = []
    items.Push({
        url: "pkg:/assets/dialog.png"
        TargetRect: dlgRect
    })
    items.Push({
        Text: txt
        TextAttrs: { font: "large", color: "#a0a0a0" }
        TargetRect: txtRect
    })
    canvas.SetLayer(0, { Color: "#a0000000", CompositionMode: "Source_Over" })
    canvas.SetLayer(1, items)
    canvas.Show()
    ….
End Function

Perhaps the most interesting part of the rendering of this second image canvas is the assignment of the z-order 0 layer.  The composition mode used here is Source_Over.  This means that the source pixels, i.e., those in the new canvas, are alpha blended with the destination pixels in the first image canvas that we are drawing on top of.  With the Source_Over composition mode, the alpha value in the color value becomes important.  Specifically, we use a value of #a0000000.  A0 is the alpha value, defining the level of transparency.  The RGB values in the 3rd through 8th digits specify the background color of the new image canvas.  In this case we get the nice visual effect of the screen below the dialog appearing inactive while the dialog is displayed.

The best way to really understand the nuances of using the image canvas is to experiment with some code.  Download the sample channel and dig in.  For example, in the code above change the first SetLayer() call to the following to get an alpha blended green background on the screen when the dialog is displayed:

canvas.SetLayer(0, { Color: "#4000ff00", CompositionMode: "Source_Over" })

The possibilities are endless.  The roImageCanvas component includes more functionality than I could cover here, but this article should get you started using image canvas in your channels.  Visit this link for a complete view of what the image canvas can do.  See what you can come up with, and feel free to let me know how it goes.


Building a Custom Video Player

$
0
0

Have you ever wanted to create your own video player for your Roku channels?  Most channels use the roVideoScreen template provided with the SDK.  But you can create your own video player using the roVideoPlayer component.  In addition, you can use this component along with the image canvas or 2D API discussed in previous articles to implement custom video players with interesting UI overlays. Complete documentation for the roVideoPlayer component can be found here.

This article will discuss how to build the sample player in the channel downloadable from this link.  Features of the video player include a custom loading screen, as well as a nice playlist overlay feature.  Both of these features are shown in the screen shots below.  When a video is playing, press the remote’s OK button to see the five videos in the playlist with the currently playing video highlighted.  You can up and down arrow in the playlist, highlighting other videos, and click OK to skip to that video.  During video playback, you can also press the right and left buttons skip to the next and previous videos in the playlist.

Figure 1 – Custom Loading Screen

Figure 2 – Playlist Overlay Text

The custom UI in the sample is all implemented using roImageCanvas. You can also use roScreen and the 2D API with the roVideoPlayer. However, it is important to note that video playback in this case needs to be limited to 720p due to memory constraints.

The roVideoPlayer Component

Most BrightScript channels use the roVideoScreen component to implement video playback.  This pre-built video component is recommended for most Roku channels.  The more you can use the Roku SDK templates for your development, the less work you need to do in terms of UI implementation and error handling. There are times, however, when you may want a greater degree of control over the user interface available for video playback.  For these purposes, the BrightScript SDK includes the roVideoPlayer component.

roVideoPlayer implements the ifVideoPlayer interface.  This interface contains all of the functions that you can call on a video player.  roVideoPlayer allows you to specify the dimensions and location of the rectangle on screen where video plays.  roVideoScreen, on the other hand, only allows for full screen video.

Here is a typical example of how to create a video player.  In this case it is created full screen, using the dimensions of an image canvas that is also created with the channel:

    canvas = CreateObject("roImageCanvas")
    player = CreateObject(“roVideoPlayer”)
    port = CreateObject(“roMessagePort”)
    targetRect = canvas.GetCanvasRect()
    canvas.SetMessagePort(port)
    this.canvas.Show()
    player.SetMessagePort(port)
    player.SetDestinationRect(targetRect)

If you instead wanted a video region that is smaller than full screen and located somewhere other than the upper left corner, you could simply change the rectangle passed to SetDestinationRect().

roVideoPlayer supports all of the same video formats as roVideoScreen. Content metadata values used to program roVideoScreen are the same as well, and are used in the same way.

One important difference between roVideoScreen and roVideoPlayer is that roVideoPlayer has a Play() function for starting video playback, unlike roVideoScreen. Since an roVideoScreen is a complete screen with full video UI, you just call Show() to display the screen, and whatever content has been set on the screen will start to play. roVideoPlayer is much more like a component that provides video, rather than a screen. As it might be embedded in other screens, it needs a function other than Show() to start playback. That’s what Play() does:

    Boolean Play(Void)

ifVideoPlayer also includes functions to stop, pause and resume video playback:

    Boolean Stop(Void)
    Boolean Pause(Void)
    Boolean Resume(Void)

There are lots of cool things that you can do with the roVideoPlayer component when it comes to customization. As with most things in life, this kind of power and flexibility comes at a price. The roVideoPlayer is the lowest level video component available in BrightScript. It basically just does video playback for you. Other UI features that you get for free when using the roVideoScreen must be implemented from scratch in your channel. This includes seeking forward and reverse, any kind of on screen playback controls or playback progress indicators. Also, there are no trick play effects with the roVideoPlayer like there are with the roVideoScreen. Let’s take a look at how to overcome some of these limitations.

roVideoPlayer Events

The roVideoPlayer receives a variety of events indicating status and state of video playback. These events are sent to the channel as roVideoPlayerEvent instances. The complete list of these events can be found in the SDK documentation at this location. Your channels can handle these events to make updates to your custom video player UI.

For example, to implement the custom loading screen in the sample channel, the BrightScript code needs to respond to the roVideoPlayerEvent isStatusMessage. This event provides information about the video download progress, which can be used to update the loading screen UI:

    list = []        
    progress_bar = {TargetRect: {x: 350, y: 500, w: 598, h: 37},
         url: "pkg:/images/progress_bar.png"}
    msg = wait(0, m.port)
    if msg <> invalid
        'If this is a startup progress status message, record progress
        'and update the UI accordingly:
        if msg.isStatusMessage() and msg.GetMessage() = "startup progress"
            progress = msg.GetIndex() / 10
            if m.progress >= 0 AND m.progress = 20 AND m.progress < 40
        progress_bar.url = "pkg:/images/progress_bar_2.png"
    …
    endif
    list.Push(progress_bar)
    m.canvas.SetLayer(0, { Color: color, CompositionMode: "Source" })
    m.canvas.SetLayer(1, list)

This code snippet demonstrates the basic technique for tracking video download progress. When the event loop receives a startup progress event, it reads the download progress value from the event’s GetIndex() value and then loads and renders a progress bar image accordingly. A channel could also render text instead of images to indicate progress. The choice is up to you and to the capabilities of the roImageCanvas component that does the drawing. isStatusMessage() can indicate other statuses as well, such as “start of play” (indicating that video playback has started), “end of stream” and “end of playlist”.

Another event commonly used when implementing custom video players is the isPlaybackPosition event. This event is sent to roVideoPlayer to indicate the current position, in seconds, of video playback. This event can be used to trigger the update of playback progress controls.

    if msg.isPlaybackPosition()
        position = msg.GetIndex()
    endif

You can specify how frequently this event is sent by calling the SetPositionNotificationPeriod() function:

    Void SetPositionNotificationPeriod(Integer period)

The period argument specifies the frequency, in seconds, of the notification. Please note as well that the position playback event will not be sent to the event loop if the notification period value is not set.

Error Handling

Another category of work that you will need to do from scratch when using roVideoPlayer is video playback error handling. When using the SDK roVideoScreen template, all of this is implemented for you. A typical example of the kind of error handling that you need to implement with roVideoPlayer is underrun detection. The roVideoPlayerEvent isStreamStarted event sends information about the stream that is started. The Info associative array sent with this message contains the following information:

    Info = {
        url: (Url of stream)
        StreamBitrate: (Bitrate of stream in kbps)
        MeasuredBitrate: (Actual bitrate of video transfer in kbps)
        IsUnderrun: (true if stream started as the result of an underrun)
    }

With this information, conditions such as underruns, playback quality issues related to network bandwidth and the like can be detected.

Building Playlists

Another unique feature of the roVideoPlayer is the ability to create playlist experiences. ifVideoPlayer includes a function called SetContentList():

    Void SetContentList(Array contentList)

This function takes an array of video stream specifications. When you call Play() the video player will start playing the first video in the array. After each video completes, it starts the next video in the list automatically. Once the last video has completed, the player will loop back to the first video if so specified by this function:

    Void SetLoop(Boolean loop)

You can also set the next video to play by calling SetNext():

    Void SetNext(Integer item)

The item argument specifies the 0-based index of the video in the content list to play next.

As an example, here is how you might load a playlist from a JSON file and then populate the video player content list.

  player = CreateObject(“roVideoPlayer”)    
  jsonAsString = ReadAsciiFile("pkg:/json/sample.json")
  feedData = ParseJSON(jsonAsString)
  contentList = []
  for each video in feedData.Videos
      contentList.Push({
        Stream: { url: video.url }
        StreamFormat: "mp4"
      })
  end for    
  player.SetContentList(contentList)
  player.Play()

Grab the sample channel from this link and experiment around, and you’ll have your own custom video players running in no time.

Supporting In App Purchases in Your Roku BrightScript Channels

$
0
0

Monetizing applications is a common requirement for software developers. Roku developers are no different. Fortunately, the Roku platform has great support for in-app purchases. This article will cover everything you need to know to start monetizing your Roku channels with subscriptions and other purchases.

To make it easier to understand Roku’s in-app purchase capabilities, I’ve included a simple test channel that supports in-app purchase. This test channel presents a set of products for purchase, and places a check mark next to the ones that the user has already purchased. Selecting one of the products triggers the purchase flow in the channel.  Keep in mind that this sample is very rudimentary and is primarily meant to show how to use the BrightScript in-app purchase APIs.  A production channel would include a lot more purchase flow UI.

The sample channel can be downloaded from this link: InAppPurchase.zip
A detailed overview of the Roku billing platform can be found here: Roku Billing Platform

Creating In-App Products

Before you can make purchases from your channel, you need to create products and associate them with your channel. Products are created and managed through your Roku developer account. Log into your Roku account, click Developer Site, and then Manage My In-Channel Products:

After clicking the Manage My In-Channel Products link, you will see a page that lets you create and edit all of your in-app products:

If you press the Add a Product button, you are taken to another screen that allows you to specify the product type, product code, price and other product information.  Product type can be one-time purchase or subscription, with one-time purchases further characterized as either consumable or non-consumable.  A consumable one-time purchase is something like a TVOD video title that you rent and can watch only once.  A non-consumable one-time purchase might represent a video title that you buy through a channel and then have access to forever.  When creating or editing a product, you also specify which of your published channels the product is associated with.  This defines which channels the product can be purchased from.

The roChannelStore and roChannelStoreEvent Components

In-app purchase is implemented via BrightScript using the APIs implemented by the ifChannelStore interface.  This interface is implemented on the roChannelStore component.  This interface includes methods for operations like making purchases, retrieving the list of products available for purchase in a channel, and the subset of those products that the Roku user has already purchased.  In response to any of these calls, the BrightScript event loop will receive an roChannelStoreEvent.  Full documentation of these components can be found here:
roChannelStore and roChannelStoreEvent Docs

Let’s take a look at how these components are used to implement making a purchase. First, the channel creates an roChannelStore instance. Then the BrightScript code needs to create an order and assign it to the roChannelStore instance by calling SetOrder. The channel then calls DoOrder to place the order.

    store = CreateObject("roChannelStore")
    port = CreateObject("roMessagePort")
    store.SetMessagePort(port)
    order = [{
        code: “TS1”
        qty: 1        
    }]
    store.SetOrder(order)
    result = store.DoOrder()
    if (result = true)
        print “Order Succeeded”
    else
        print “Order Failed”
    endif

The order object contains two items, the product code of the product to be purchased, and the number of these items to purchase. The product code is defined when the product is created via the Manage In-Channel Products screen. DoOrder returns true if the purchase is successful and false otherwise. Upon a successful purchase, the channel will receive an roChannelStoreEvent. Calling GetResponse on this event returns a variety of information about the transaction, including the purchase ID and product code. The information returned includes tax details.

    while (true)
        msg = wait(0, port)
        if (type(msg) = "roChannelStoreEvent")
	    purchaseDetails = msg.GetResponse()
        end if
    end while

purchaseId = 12345
total = $1.99
qty = 1
amount = $1.99
code = TS1
total = $0.00
qty = 1
amount = $0.00
code = SKUTAX

Your channel can query for all of the products available for purchase in the channel by calling the ifChannelStore function GetCatalog. After calling this function, your channel will receive an roChannelStoreEvent whose GetResponse function will return XML containing information about all of the products associated with the channel.

You can also query for the channel products that the user has purchased by calling the ifChannelStore GetPurchases function. This function results in an roChannelStoreEvent whose GetResponse function returns XML with the subset of the channel products that have been purchased by the user.

Sharing User Account Information

An important in-app purchase use case is purchasing subscriptions. For example, a channel may have a variety of free content such as clips, but require a paid subscription for full-length premium content. Content providers generally require an account with the provider’s service as part of the subscription signup process. To make such registration easier, or to aid in verifying a third party account, the Roku platform can provide the user’s Roku account information to the channel without requiring the user to enter this information via an on-screen keyboard. This is done by calling the ifChannelStore function called GetUserData. Calling this function presents the user with a screen similar to the one shown below:

This screen presents the user with their Roku account information and two buttons labeled Share and Don’t Share.  If the user presses the Don’t Share button, GetUserData returns invalid.  If the user presses Share, GetUserData returns an associative array with the user’s account information.  This information can then be used in content provider service API calls for purposes such as creating or verifying  accounts on the partner service.  Here is a dump of the information returned for the user in the previous screen:

country: US
firstname: Roku
lastname: User
phone:
street1: 123 Any Street
state: AL
email: arokuuser@roku.com
zip: 12345
city: Anytown
street2:

A channel can also request a more limited set of user account information by calling the function GetPartialUserData:

    GetPartialUserData(properties as String) as Object

You pass this function a comma separated list of the user account properties you want, and the function returns an object, like that returned by GetUserData, with just those account values. The data sharing screen that is displayed when calling GetPartialUserData contains only the requested account elements as well. For example, to retreive only the email address and first name of the Roku account holder, you would call:

    GetPartialUserData("email, firstname")

The full set of properties that can be specified in the function argument is:

firstname
lastname
email
street
city
state
zip
country
phone

Testing Channels With In-App Purchase

Channels that support in-app purchase present a few additional challenges when it comes to testing when compared to other channels. In addition to all of the UI flow and other features in a channel, in-app purchase channels need to have products created, and successful and unsuccessful transactions need to be tested. Furthermore, to test purchases with the actual products associated with your channel, your channel needs to be published to the Roku Channel Store as either a public or a private channel. This limits your debugging options. For example, published channels can’t be debugged with the telnet debug console.

Fortunately, there are a number of tools available that make this easier. First, the Roku billing web service includes three test products that can be accessed whenever a channel is side loaded. If a side loaded channel calls the ifChannelStore GetCatalog function, the three products shown below are returned via an roChannelStoreEvent:

Product  1 represents a non-consumable product, while Product 2 is consumable.  There is also a choice which will fail, allowing you to test purchase failures in your side loaded channel.

Another powerful debugging tool is the fake server mechanism.  This is also very useful for testing side loaded channels, but provides much more flexibility that the three fake products just described.  With this technique, your channel uses a set of XML files that simulate the web service request and response data.  A channel indicates that it wants to use the fake server approach by passing true to the ifChannelStore FakeServer function:

store = CreateObject(“roChannelStore”)
store.FakeServer(true)

In-app purchase API calls will now be driven by the XML files in the channel’s csfake directory:

csfake/GetCatalog.xml
csfake/GetPurchases.xml
csfake/PlaceOrder.xml
csfake/CheckOrder.xml

GetCatalog.xml and GetPurchases.xml simulate the list of products available for purchase in the channel and those products already purchased by the user, respectively. PlaceOrder.xml contains the information about the product to be ordered, and CheckOrder.xml is used to verify the validity of the order. For example, if the <order><id>values in these two files don’t match, the fake server will report an error in the order processing. Using the fake server mechanism, you make the same ifChannelStore function calls to create orders and make purchases, and your channel still receives roChannelStoreEvents.  The difference is that the data used in these call flows is derived from the csfake XML files.

Even with these debugging tools, before publishing your channel you should still test it with real products.  To do this, publish your channel as a private channel, associate your products with the channel, and test a few purchases. To prevent Roku from billing you for these live test purchases, you can define test users and associate them with your channels.  From the developer site, click the Manage Test Users link.  You will be taken to a page like this:

This screen lets you add the Roku account email address of any user (including yourself) who will then be treated as a test user for the set of specified channels.  No purchases in those channels will be charged to those users.  To make live purchase testing even easier, you can void transactions so that the same purchase can be tested more than once if needed.  Press the View link under the Transactions heading for a particular test user and you will get a list of all transactions for that user, plus the option to void transactions. Products must be cleared for sale and approved before your channel can discover them with the ifChannelStore GetCatalog API.

As with any new development topic, the best way to learn the details is to dig into some working code.  So feel free to download the sample channel from here and happy coding!

New Closed Caption Features for BrightScript Developers

$
0
0

Over the past few months, Roku has added a number of improvements to closed caption support for its non-legacy devices. First, the Roku platform recently added a new settings UI screen for controlling closed captions across all channels installed on user’s Roku player. The intention of these new global settings is to provide a single place for enabling or disabling closed captions and for setting caption rendering preferences such as caption text font, size, color, and the like. It is Roku’s position that individual channels will respect the global caption settings, thus eliminating the need for channel specific UI to control closed captions. The overall Roku closed caption user experience will be vastly improved as users can set their caption settings in one place and have these settings reflected in all of their channels.

In addition to the global close caption settings, the Roku platform now supports caption rendering in the roVideoPlayer component. Previously captions could only be used in the roVideoScreen. Now developers who build channels with custom UI and video playback using roVideoPlayer can include closed captions as part of their video playback experience.

The Roku SDK now includes new BrightScript components and APIs to let developers take advantage of these features which are described in this article. This article also includes a sample BrightScript channel demonstrating how to use the new APIs. This sample can be downloaded from this link.

Global Closed Caption Settings

Roku supports various industry standard closed caption delivery formats. See this document for details. The 608 and TTML formats also allow content providers to include text styling information in the caption data to control the visual appearance of the caption text on screen. The new Roku closed captions settings UI lets users control turning captions on and off, and also lets them override the caption styling properties provided by the content. The global closed caption settings screen is shown here:

BrightScript developers can query these various global setting values from their channels. The roDeviceInfo component supports two closed caption related functions, GetCaptionsMode and GetCaptionsOption:

    GetCaptionsMode() as String
    GetCaptionsOption(option as String) as String

The first of these functions simply returns a string On, Off, or Instant Replay, indicating the global caption state. In the Instant Replay state, captions are only displayed during playback for the section of video replayed after pressing the instant replay remote button. The GetCaptionsOption function is used to query the state of style settings such as caption text and background color, opacity, etc. A full set of option names that can be passed to this function can be found in the Roku SDK documentation at this link.

The Roku SDK offers several options for supporting closed captions in your BrightScript channels. These options range from doing nothing but configuring your content meta data to point to your caption source and playing content in roVideoScreen, to rendering closed captions completely from scratch within the roVideoPlayer. Let’s look at the simple case first.

Rendering Captions in roVideoScreen

Most BrightScript channels use the roVideoScreen component for video playback. This component provides the fully featured default Roku playback experience, including built in trick play support, so developers need to do very little to play content. roVideoScreen provides closed caption support with the same content meta data driven approach as the other features of the component.

roVideoScreen can render captions delivered as either external files or embedded directly in dedicated tracks in the content stream. For example, an MP4 video with TTML closed captions in a separate file can be played with the following code:

    videoScreen = CreateObject("roVideoScreen")
    metaData = {
        Stream: {
            Url: “http://video.ted.com/talks/podcast/DavidKelley_2002_480.mp4”
        }
        StreamFormat: “mp4”
        SubtitleUrl: “http://10.0.0.3/roku/captions.ttml”
    }
    port = CreateObject("roMessagePort")
    videoScreen.SetMessagePort(port)
    videoScreen.SetContent(metaData)
    videoScreen.Show()

If the user has set the global closed caption setting to On, the code above will play the specified video along with the specified closed captions. If the user turns global closed captions to Off, the same channel code will play the video without the captions, even though the caption metadata is specified. BrightScript can override the global closed caption setting if desired by calling the roVideoScreen function ShowSubtitle. This function takes one Boolean argument which specifies whether to show or hide closed captions. There is a similar function, ShowSubtitleOnReplay, that controls whether captions are displayed when the instant replay button is pressed on the remote. Channels generally won’t need to override these global settings. In fact, Roku recommends that channels respect the global settings set by users with the global settings screen. If a channel does for some reason need to override the settings, any changes should only be for that channel session. Once the user exists the channel and later starts it up again, the default caption behavior should be to respect the global settings.

The Roku firmware provides a shortcut to the global closed caption settings from within BrightScript channels. Pressing the * key on the remote during playback in an roVideoScreen will display a dialog like the one shown below:

This interface allows users to control captions within the channel. The last item in the dialog lets the user select the caption track for content that supports multiple languages or audio tracks. Changes made in this dialog are only kept for the current channel session. The global defaults can only be controlled with the global caption settings screen.

Rendering Captions in roVideoPlayer

Although the majority of BrightScript channels use roVideoScreen for content playback, more and more developers are interested in building their own custom Roku playback experiences. Custom video players are built by embedding an roVideoPlayer inside an roScreen or roImageCanvas. Closed captions can be rendered in roVideoPlayer with the help of the new roCaptionRenderer component. This component is documented here.

roCaptionRenderer gives BrightScript developers a lot of flexibility in how to render captions. In some cases, developers may be using roVideoPlayer because they want to render their own custom playback controls, but want the Roku firmware to provide the default closed caption rendering. In other cases, developers may be using roVideoPlayer to completely customize the way closed captions are displayed, from custom placement to custom fonts. Below is a screen shot from the sample channel showing caption rendering with a custom font:

The different levels of caption renderer support are called modes. Mode 1 rendering relies on the Roku firmware to do caption drawing. Mode 2 however requires the BrightScript code to implement all aspects of closed caption rendering within the channel. The mode is set by calling the roCaptionRenderer SetMode function:

    SetMode(mode as Integer) as Void

If the mode is 1, the BrightScript must call the roCaptionRenderer function SetScreen to tell the firmware where to draw:

    SetScreen(screen as Object) as Void

Additionally, if the channel is rendering captions in an roScreen instance (as opposed to an roImageCanvas instance) the script must also call the roCaptionRenderer UpdateCaption() function to tell the firmware to draw the caption text. An roScreen should call UpdateCaption() in response to the isCaptionUpdateRequest event. The table below summarizes the steps required to render captions with a caption renderer in mode 1.

roScreen roImageCanvas
Call SetScreen() Call SetScreen()
Call UpdateCaption()

If the mode is 2, regardless of whether captions are to be rendered in an roScreen or an roImageCanvas instance, the BrightScript code is responsible for doing all of the caption text rendering. In this case, the BrightScript event loop will receive isCaptionText events for each caption string. The channel is then responsible for doing all of the caption string drawing.

BrightScript channels do not directly create instances of roCaptionRenderer. When a channel creates an roVideoPlayer and assigns it to a screen, the Roku firmware creates an roCaptionRenderer. The channel can then get a reference to this caption renderer by calling the new roVideoPlayer GetCaptionRenderer function:

    GetCaptionRenderer() as Object

With this reference, your BrightScript code can set the caption mode, call UpdateCaption, etc. The code below shows how to use the roCaptionRenderer to display TTML captions embedded in a smooth stream using an roVideoPlayer embedded in an roScreen. In this example, we are using roCaptionRenderer mode 1 so the caption string drawing is done in firmware.

    Function Main() as void
        screen = CreateObject("roScreen")
        player = CreateObject("roVideoPlayer")
        port = CreateObject("roMessagePort")
        player.SetMessagePort(port)
        player.SetContentList([
        {
            Stream : {
                url: http://...
            }
           StreamFormat : "ism"
           TrackIDAudio: "audio_eng"
           TrackIDSubtitle: "ism/textstream_eng"
        }
      ])
      captions = player.GetCaptionRenderer()
      captions.SetScreen(screen)
      captions.SetMode(1) ‘Not strictly required as mode 1 is the default
      captions.SetMessagePort(port)
  captions.ShowSubtitle(true)
  player.Play()
  screen.SwapBuffers()
  
  while true
      msg = wait(250, port)
      if (msg  invalid)
	      if type(msg) = "roCaptionRendererEvent"
	          if (msg.isCaptionUpdateRequest())
                      screen.Clear(&h00)
                      captions.UpdateCaption()
                      screen.SwapBuffers()
	          endif
	      endif
      endif
  end while
End Function

The video player content meta data is configured as in any other video channel, then the caption renderer instance is grabbed from the player with the GetCaptionRenderer call. The channel then sets the screen associated with the renderer. This tells the Roku firmware which screen to draw caption strings in for mode 1 rendering. The caption renderer is also assigned a message port so that the BrightScript event loop can receive roCaptionRendererEvents. In the mode 1 case above, the channel will receive isCaptionUpdateRequest events. In response to this event, the channel calls the roCaptionRender UpdateCaption() function, which tells the firmware to draw the specific caption string.

To learn more about Roku closed caption support download the sample channel. The sample is a more fully featured example, showing how to render both mode 1 (firmware drawn) and mode 2 (channel drawn) captions. Happy coding!

Changes Coming Soon to the Roku Developer Agreement

$
0
0

Dear Roku Developer:

Thank you for choosing the Roku platform. With support from developers like you, Roku continues to offer consumers the broadest selection of content for streaming to the TV. We also continue to invest in the scale and reach of the platform resulting in more consumer engagement than ever before. In 2014, Roku streamed over 3 billion hours of content, up 72% from the prior year, and ended the year with about 7 million monthly active accounts.

We’re writing to let you know about changes coming soon to the Roku Developer Agreement.

Starting later this month, we will replace our current Developer Agreement with two different agreements. The first is the new SDK License Agreement, which allows developers to use our Software Development Kit (SDK) to build and test a Roku channel. The second is the new Application Distribution Agreement, which allows developers to publish a channel on the Roku platform. 90 days before the expiration of your current Developer Agreement, you will receive a notice requesting that you read and execute the new Application Distribution Agreement. The key changes include:

  • Paid channels (subscription, transactional, and pay-to-install) that are in the Roku Channel Store must support Roku Billing Services. This will simplify the sign-up process for consumers and help you build your audience more quickly. There will be a revenue share distribution where we remit 80% back to you monthly. For existing channels that already use the Roku billing API,
    we’ve lowered the revenue share from 30% to 20%!
  • Ad-supported channels that are in the Roku Channel Store may be asked by Roku to provide up to 30% of video ad inventory that we may sell on our behalf. Note that Roku will not typically exercise this option for channels with a small audience.

These changes will be live on Roku’s developer site, developer.roku.com, in late September. You can read more about the changes here. Please review both the SDK License agreement and the Application Distribution agreement for more details. We’ve also created an FAQ. And of course, let us know if you have any questions. Thanks again for your support of the Roku platform!

Sincerely, Roku Partner Management and Developer Support Teams

Viewing all 12 articles
Browse latest View live